 |
|
APPROACH
TO and BATTLE FOR STANLEY (Parts 41-49)
Part 46.
42 COMMANDO'S APPROACH TO and BATTLE
FOR MOUNT HARRIET
11th/12th
June 1982
|
|
|
|
|
| |
BRITISH
FORCES
42 Cdo RM, including GPMG's, LAW's,
MAW's, Milans and 81mm mortars, and in support
6x105mm artillery of 7 Bty, 29 Cdo Regt RA and
frigate "Yarmouth" with 2x4.5in.
In reserve - 1st Welsh Guards with A and C Coys 40
Cdo
42 Cdo RM Commanders:Lt
Col N F Vaux RM, Maj M J Norman RM, J Coy, Capt P
M Babbington RM, K Coy (1, 2 and 3 Troops), Capt D
G Wheen RM, L Coy (4, 5 and 6 Troops)
|
|
ARGENTINE
DEFENDERS
4th Inf Regt defending Two Sisters and
Mount Harriet area, supported by snipers, heavy mg's,
mortars and artillery. |
|
| |
|
| |
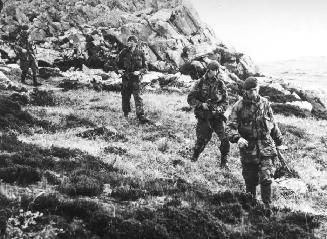
 Approach
to
Mount Harriet - Following K Coy's helicopter
flight forward on to Mount Kent over the night of Sunday
30th May to join D Sqdn SAS, the rest of 42 Cdo moved to
Mount Challenger during that week, and were eventually
joined by K Coy. From there, they pushed out a troop
strength observation post to Wall Mountain, and planned for
an attack on the heavily defended Mount Harriet. An advance
direct from Wall Mountain across minefields and into
Argentine machine guns, was out of the question, and a left
flanking move would risk overlapping 45 Cdo's assault on Two
Sisters. Lt Col Vaux therefore decided on a right hook
taking him well south of the more northerly Fitzroy/Stanley
track to come up behind the Argentines from the south east.
Finding an approach route through the extensive minefields
and pinpointing enemy positions on this side of Mount
Harriet called for careful patrolling, and for his part in
this, Sgt Collins was decorated. And, as in the other
battles and the approaches to them, men of the Royal
Engineers played a key role in dealing with the minefields. Approach
to
Mount Harriet - Following K Coy's helicopter
flight forward on to Mount Kent over the night of Sunday
30th May to join D Sqdn SAS, the rest of 42 Cdo moved to
Mount Challenger during that week, and were eventually
joined by K Coy. From there, they pushed out a troop
strength observation post to Wall Mountain, and planned for
an attack on the heavily defended Mount Harriet. An advance
direct from Wall Mountain across minefields and into
Argentine machine guns, was out of the question, and a left
flanking move would risk overlapping 45 Cdo's assault on Two
Sisters. Lt Col Vaux therefore decided on a right hook
taking him well south of the more northerly Fitzroy/Stanley
track to come up behind the Argentines from the south east.
Finding an approach route through the extensive minefields
and pinpointing enemy positions on this side of Mount
Harriet called for careful patrolling, and for his part in
this, Sgt Collins was decorated. And, as in the other
battles and the approaches to them, men of the Royal
Engineers played a key role in dealing with the minefields.
The final plan was to leave J
Coy on Wall Mountain ('Tara') both as a reserve and to
create a diversion, and for K and
L Coys to march from the western end of Wall Mountain and
across the Fitzroy/Stanley track before swinging east and
then up to the start line behind Mount Harriet ('Zoya').
Moving off at
8.30 pm, K Coy was to
attack the eastern end, and an hour later, L Coy the
western end, after which 42 Cdo would move on to take Goat
Ridge ('Katrina'). Unlike the other two attacks, this one
was 'noisy' with Mount Harriet receiving a preliminary
bombardment as part of the diversion plan.On Friday 11th,
as 42 Cdo prepared to move off, Argentine shellfire killed
one of the Marines on Wall Mountain. Later, K and L Coys
started off from Mount Challenger, with one of J Coy's
Troops going ahead to mark the route and drop off Milan
sections, including one on the Stanley track in case any
of the Argentine Panhard armoured cars should appear. They
were also due to meet up with a Welsh Guards patrol
assigned to secure 42 Cdo's start line. But there was a
delay and H-hour held up, although J Coy went ahead and
opened fire from Wall Mountain to simulate a large scale
clash.
|
| |

Battle for Mount
Harriet - K Coy crossed the start line at
10.00 pm, and almost reached the Argentine positions
without being spotted. On the left, 1 Troop engaged the
first enemy, and 2 Troop to the right went ahead to start
clearing their part of K Coy's objective during which time
42 Cdo suffered its only fatal casualty of the night. 3
Troop now passed through 2 Troop on to the summit, and
with 1 Troop below them to the south, started to work
their way westwards bunker-by-bunker, but were held up by
machine gun fire. It was at this time that three K Coy
Corporals - Newland of 1 Troop and Eccles and Ward of 3
Troop - won the Military Medal for taking the enemy
position.
While K Coy was fighting on the
eastern end of the summit and coming under artillery fire, L
Coy was making its way up towards the western end of Mount
Harriet under heavy machine gun fire which opened up soon
after they crossed the start line. Milans were successful in
knocking out these and other enemy sniper positions, but it
took a number of hours and casualties from artillery, before
L Coy's half of the summit was taken, still in the dark. 5
Troop was then sent forward to the next objective just to
the north of the summit, but was initially held up until the
enemy resistance crumbled under mortar and artillery fire.
With dawn and L Coy still
fighting forward, K Coy was ordered on to Goat Ridge, by
which time J Coy had moved directly across from Wall
Mountain to join in the final securing of Mount Harriet,
running through a minefield on the way. In successfully
taking its objective, 42 Cdo had lost just one man killed.
|
| |
|
British
Gallantry Awards
|
| |
| |
Approach to*
and Battle for Mount Harriet by 42 Cdo RM
Lt Col N F Vaux (DSO) RM
Capt P M Babbington (MC) RM, K Coy
Sgt M Collins (MM) RM, K Coy *
Cpl M Eccles (MM) RM, K Coy
Cpl S C Newland (MM) RM, K Coy
Cpl C N H Ward (MM) RM, K Coy |
|
| |
| |
|
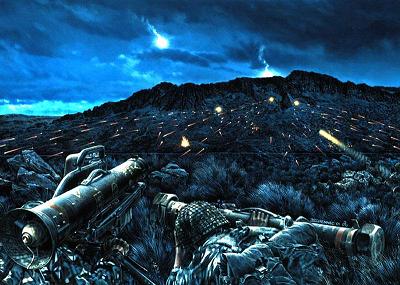
Battle for Mount
Harriet - from the
Art of Daniel Bechennec
|
| |
| |
| |
|
on
to 47.
2 Para Battle for Wireless Ridge
or back to
Falklands War HomePage
revised 31/5/13
|
|
|
